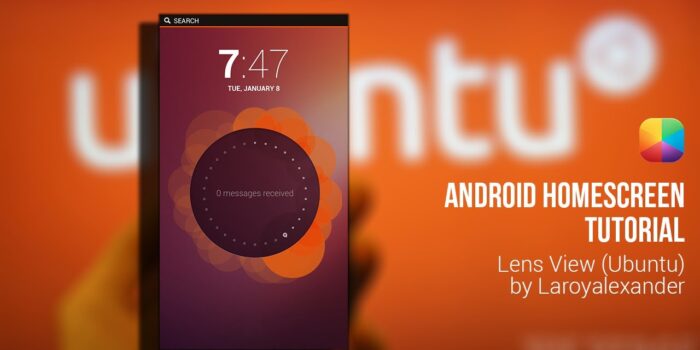
Android lovers can now experience Ubuntu for their phone without having to wait or install anything more than a few widgets, thanks to Laroyalexander and his jaw-dropping screen of the day Lens View! Even if you have no idea what Ubuntu is, I can bet you are going to love this homescreen tutorial!
Stuff to copy onto your phone:
UCCW skins: http://bit.ly/SPLfQg
Wallpaper & Icons: http://bit.ly/14Matib
Blank.png: http://bit.ly/V5iaxf
Here are all the apps you need:
Apex Launcher Pro: http://bit.ly/V7Ryvy
UCCW: http://bit.ly/10BIOnI
Multipicture Live Wallpaper: http://bit.ly/101AUxN
Simple Calendar Widget: http://bit.ly/XGwJYO
Minimal Reader Pro: http://bit.ly/10gIKsd
Desktop VisualizeR: http://bit.ly/USMsBx
WidgetLocker: http://bit.ly/11BKTiI
Here is the link to Lens View on MyColorScreen:
http://bit.ly/WKDBBJ
=====================================
Part 1: Apex Settings
Homescreen Settings:
Portrait Grid: 10×10 (or change if widgets aren’t aligning)
Manage Screens: 2
Transition Effect: Any
Wallpaper Mode: Multiple Screen
Hide: Notification Bar, Shadows, Icon Labels
Dock Settings:
Hide Dock: Enabled
Behaviour Settings:
Home key action: Show app drawer (comes in handy)
Advanced Settings:
Resize Any Widget: Enabled
Overlapping Widgets: Enabled!! (Might be for Pro only)
————————————————————————-
Part 2: Wallpaper
Now I’d first suggest you try see if the given wallpapers fit on your phone.
If they don’t, Photoshop or GIMP (or any other photo editing software can be used).
There are 3 ways of modifying the given wallpapers, here they are:
1.1 Drag a screenshot you have taken from your phone onto PS.
1.2 Drag a wallpaper you want to modify over this screenshot.
1.3 Move the “handles” of this wallpaper so that they snap onto the screenshot.
1.4 Save this as a .png then copy it onto your phone.
If you don’t have PS or even a computer, use this method (Thanks to lkim802):
3.1 Download Photo Editor (free) from the Play Store: http://bit.ly/UUrQZJ
3.2 Select Gallery – Resize/Fit – Resize.
3.3 Select Manual, deselect “Keep aspect Ratio”, then add in your phone’s screen resolution.
3.4 Save as either a .png or .jpg into a folder where you keep your wallpapers.
Once you have completed setting up all three wallpapers, open up MultiPicture Live Wallpaper, then follow these steps:
Menu – Wallpapers – Live Wallpaper – Multipicture Live Wallpaper.
Settings – Add individual settings – Add 1 then 2.
Then change screen 1 settings – Picture source – Single Picture – Add Screen 1 wall, then repeat for screen 2.
Remember to change Crop/Resize Ratio to – Fit to Fullscreen if you need to.
Change transition type if desired.
Go Back – Set wallpaper.
————————————————————————-
Part 3: Screen 1 settings
This wallpaper can either be one with icons or a variant of one with icons.
If you choose the one with icons (as shown in the video), then you need to add Desktop VisualizeR widgets (2×1 size) over each one, and change the image to the blank.png.
If you choose the one with no icons, then your DVR icons must be those icons located in the link above.
Minimal Reader Pro was added, with all backgrounds transparent, text white, and settings buttons and feed count hidden.
————————————————————————-
Part 4: Screen 2 settings
For the Frequent Apps, Desktop VisualizeR was used again, same 2×1 size and using the icons that are provided. Select the appropriate app to launch, as well as clearing the label and taking off touch effects if desired.
Simple Calendar Widget was then used for the calendar. All that was changed is Making the line and background transparent and changing the date on the left size to zero.
Finally UCCW was added at the bottom to display the notifications. To add a skin, choose any size for the UCCW widget, then select “open .uzip” and locate ubuntu notif.uzip on your phone.
————————————————————————-
Part 5: WidgetLocker
Here are the options you need to change:
—Look and Feel:
—–Alternative Wallpaper: Enabled
—–Select Wallpaper: Changed to the Ubuntu Lockscreen wallpaper
—–Background Tint: 0
—–Layout: Grid Size – 12×8 (change if widgets aren’t aligning)
—–Hide Notification Bar: Enabled
Clock widget used is Clock JB
UCCW skin was used in the middle for the messages, add it the same way as the notifications in Screen 2.
Hold down on the screen – Custom slider – Use this theme: http://bit.ly/U3KtwZ – Swipe the arrow across to enable you to change the icon to a blank.png
*Remember you must copy this theme onto your phone, then use any file explorer to install it…
————————————————————————-
Thank you very much for watching and don’t forget to share/like/comment/subscribe!
Boom!
